Fire Hose Testing: Fire hoses are critical components of fire protection systems, ensuring that firefighters have the necessary tools to combat fires effectively. Regular testing of fire hoses is essential to maintain their reliability and performance.
This blog post will provide a comprehensive, step-by-step procedure for testing fire hoses, ensuring they meet safety standards and are ready for emergency use.
Why Fire Hose Testing is Important
Before diving into the step-by-step procedure, it’s crucial to understand why testing fire hoses is necessary:
- Safety Assurance: Regular testing helps ensure that hoses are free from defects, leaks, and other issues that could compromise their effectiveness during an emergency.
- Compliance with Regulations: Many jurisdictions have regulations that require regular testing and maintenance of fire protection equipment, including hoses.
- Longevity of Equipment: Proper testing and maintenance can extend the lifespan of fire hoses, saving money in the long run.
- Operational Readiness: Ensuring that hoses are in good working condition means they will perform as needed when emergencies arise.
Step-by-Step Procedure for Fire Hose Testing
Step 1: Gather Necessary Equipment
Before starting the testing process, gather all necessary equipment:
- Fire Hose: Ensure you have the hose that needs testing.
- Water Supply: A reliable water source, such as a fire hydrant or pump, is essential.
- Pressure Gauge: To measure the pressure in the hose during testing.
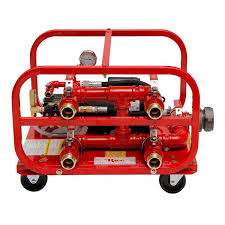
- Hose Testing Machine (Optional): These machines can automate the testing process.
- Flow Meter: To measure the flow rate of water through the hose.
- Personal Protective Equipment (PPE): Ensure all personnel involved in the testing wear appropriate PPE, including gloves, helmets, and eye protection.
Step 2: Inspect the Hose
Before testing, conduct a thorough visual inspection of the hose:
- Check for Damage: Look for any cuts, abrasions, or signs of wear. Pay special attention to the couplings and fittings.
- Check for Kinks: Ensure the hose is free of kinks or twists that could affect performance.
- Inspect Couplings: Check that the couplings are secure and free from corrosion or damage.
- Verify Length and Markings: Ensure the hose is the correct length and has all required markings (e.g., manufacturer, date of manufacture, and service history).
Step 3: Connect the Hose
Connect the fire hose to the water supply:
- Position the Hose: Lay the hose out straight to avoid kinks.
- Secure the Couplings: Tighten the couplings to ensure a secure connection to the water source.
- Check for Leaks: Before testing, turn on the water supply briefly to check for leaks at the connections.
Step 4: Conduct the Pressure Test
The pressure test is a critical step in ensuring the hose can withstand operational pressures:
- Determine Test Pressure: Refer to the manufacturer’s specifications to determine the appropriate test pressure, typically 150 PSI for most hoses.
- Set Up the Pressure Gauge: Attach the pressure gauge to the hose to monitor the pressure during the test.
- Increase Water Pressure: Gradually increase the water pressure in the hose to the designated test pressure.
- Hold the Pressure: Maintain the test pressure for a specified duration, usually 5 minutes.
- Monitor for Leaks: During this time, observe the hose for any signs of leakage, bulging, or other abnormalities.
Step 5: Measure the Flow Rate
After the pressure test, measure the flow rate to ensure the hose can deliver the required volume of water:
- Set Up Flow Meter: Connect a flow meter to the end of the hose.
- Open the Valve: Fully open the valve to allow water to flow through the hose.
- Record the Flow Rate: Monitor and record the flow rate in gallons per minute (GPM) for the duration of the test. Compare the results to the manufacturer’s specifications.
Step 6: Document the Results
Accurate documentation is essential for compliance and future reference:
- Record Test Parameters: Note the date, time, test pressure, flow rate, and any observed issues during testing.
- Sign Off: Have the responsible personnel sign off on the testing results.
- Maintain Records: Keep detailed records of all testing procedures and results for compliance and maintenance schedules.
Step 7: Perform Maintenance and Repairs
If any issues were identified during testing, address them promptly:
- Repair or Replace Damaged Hoses: Any hoses showing signs of damage should be repaired or replaced according to manufacturer guidelines.
- Clean the Hoses: Remove any dirt or debris from the exterior and interior of the hose.
- Store Properly: Ensure hoses are stored in a cool, dry place, away from direct sunlight, and are properly coiled to avoid kinks.
Step 8: Schedule Regular Testing
Regular testing is crucial for maintaining fire hose readiness:
- Establish a Testing Schedule: Depending on usage and local regulations, create a testing schedule (e.g., annually, semi-annually).
- Train Personnel: Ensure that all personnel involved in fire protection are trained on proper testing procedures and safety protocols.
- Conduct Inspections: In addition to scheduled tests, conduct regular inspections to catch any issues early.
Conclusion
Fire hose testing is a vital process that ensures the effectiveness and reliability of fire protection systems. By following this step-by-step procedure, you can ensure that your fire hoses are in optimal condition and ready for use in emergencies. Regular testing not only meets compliance requirements but also enhances the safety of personnel and property.
Investing time and resources into regular fire hose testing is a small price to pay for the peace of mind it provides. Maintaining your fire hoses through proper testing and maintenance will ensure that they perform as expected when you need them most. Stay safe and stay prepared!